
| 일 | 월 | 화 | 수 | 목 | 금 | 토 |
|---|---|---|---|---|---|---|
| 1 | 2 | 3 | 4 | 5 | ||
| 6 | 7 | 8 | 9 | 10 | 11 | 12 |
| 13 | 14 | 15 | 16 | 17 | 18 | 19 |
| 20 | 21 | 22 | 23 | 24 | 25 | 26 |
| 27 | 28 | 29 | 30 |
- 와이브로
- PDA
- crashlog
- php
- VS2008
- .net
- 크래시로그
- 자바스크립트
- Font
- EUC-KR
- C#
- ClickOnce
- GDI
- 기념일관리
- self-signed ssl
- C/C++
- docker
- MFC
- phpmailer
- API
- net
- 데이터 전달
- 설치제거
- protobuf-c
- plcrashreporter
- 한 번만 실행
- Antialiasing
- 블루투스 헤드셋
- M8200
- JavaScript
- Today
- Total
~☆~ 우하하!!~ 개발블로그
spring boot : file upload – form enctype 본문
이번에는 spring boot 에서 file 을 업로드하는 기본 구조를 살펴보려고 해. 이 기본 구조를 실습해보다가 경험한 완전 어이없는 실수담도 같이 공개할거야.
개발 환경
Project: fileUpload
- spring boot + gradle
- html template : thymeleaf

html 내용
우선 파일을 선택하기 위한 html 파일이 필요해. 이 파일의 이름은 files.html 이고 개발환경 IntelliJ 에서 아래 경로에 만들어 두었어.
resources/templates/files/files.html
이 파일의 내용은 아래와 같아(수정에 수정을 거듭한 후 만들어진 최종 소스코드야).
<!DOCTYPE html>
<html xmlns:th="http://www/thymeleaf.org" lang="en">
<head>
    <meta charset="UTF-8">
    <title>Files</title>
</head>
<body>

<div>
    <form action="/files/upload" method="post" enctype="multipart/form-data">
        <label for="file">파일선택:</label>
        <input type="file" id="file" name="file" />
        <input type="submit" value="upload">
    </form>
</div>

</body>
</html>
먼저 굵은 글꼴로 표시된 코드 부분을 살펴볼께.
웹 페이지에는 로컬컴퓨터에서 파일을 선택받을 수 있도록 file 타입의 input 태그를 넣었지.
<input type="file" id="file" name="file" />submit 타입의 버튼을 클릭하면 선택한 파일이 file 이라는 파라미터ID(name=”file”) 로 서버에 전달될거야. 어떤 경로(페이지)를 통해서? /files/upload 라는 경로를 통해서!
<form action="/files/upload" method="post" enctype="multipart/form-data">이 경로는 Controller 에서 매핑을 해줄거야. PostMapping 을 통해서!
<form action="/files/upload" method="post" enctype="multipart/form-data">이 정도면 html 파일 코드에 대한 설명은 충분한 것 같아. 이제 컨트롤러 부분을 살펴볼께.
컨트롤러
컨트롤러 이름을 FileUploadController 라고 작명했어. 최종 소스코드 내용을 소개해줄께. 주요한 부분은 굵은 글꼴로 표시해 두었어.
package com.woohahaapps.fileupload.controller;

import lombok.extern.slf4j.Slf4j;
import org.springframework.beans.factory.annotation.Autowired;
import org.springframework.stereotype.Controller;
import org.springframework.web.bind.annotation.PostMapping;
import org.springframework.web.bind.annotation.RequestMapping;
import org.springframework.web.bind.annotation.RequestParam;
import org.springframework.web.multipart.MultipartFile;
import org.springframework.web.servlet.mvc.support.RedirectAttributes;

@Controller
@Slf4j
@RequestMapping("/files")
public class FileUploadController {
    private final FileUploadService service;

    @Autowired
    public FileUploadController(FileUploadService service) {
        this.service = service;
    }

    @GetMapping("")
    public String getFiles() {
        return "files/files";
    }

    @PostMapping("/upload")
    public String fileUpload(@RequestParam("file") MultipartFile file, RedirectAttributes redirectAttributes) {
        if (!file.isEmpty()) {
            log.info("file.getOriginalFilename = {}", file.getOriginalFilename());
            service.store(file);
            redirectAttributes.addFlashAttribute("message", "Successfully file uploaded: " + file.getOriginalFilename() + "!");
        }

        return "redirect:/files";
    }
}
FileUploadController 클래스에 @RequestMapping(“/files”) 를 선언해서 이 클래스에 대한 기본 매핑 경로를 /files 로 설정해두었지.
그리고 fileUpload 라는 함수에 대해서 @PostMapping(“/upload”) 라고 선언해서 /files/upload 가 동작하게 했어. /files/upload 는 앞의 html 코드에서 form 의 action 경로였던거 기억하지? 그 폼의 method 가 post 였던것도 기억날거야. 빙고~! html 에서 submit 버튼을 클릭하게 되면 FileUploadController 클래스의 fileUpload 함수가 실행되는 구조야.
fileUpload 함수의 첫번째 파라미터는 MultipartFile file 인데, 이 파라미터명을 file 로 지정했어. 이것도 기억날거야. html 파일에서 file 타입의 input 태그 name 이 file 이었던걸 말이야.
자, 이렇게 연관 관계에 대한 설명은 모두 마쳤어. 이제 실제로 이 코드가 동작되는 방법에 대한 코드를 알아볼께.
서비스
컨트롤러 FileUploadController 클래스의 fileUpload 함수에서 실질적으로 파일을 서버에 저장하는 작업에 대한 코드는 service.store(file); 이라는걸 금방 눈치챌 수 있을거야. service 객체는 FileUploadController 클래스의 멤버로 선언되어 있지.
public class FileUploadController {
    private final FileUploadService service;

    @Autowired
    public FileUploadController(FileUploadService service) {
        this.service = service;
    }
...
이 멤버는 FileUploadController 클래스 생성자 함수에서 의존성 주입(DI:Dependency Injection)을 받고 있어. 즉 외부 어딘가에서 FileUploadService 객체가 생성되고 이 FileUploadController 클래스 인스턴스에서 사용할 수 있도록 생성자 함수를 통해서 주입(=대입)된다는 의미야.
FileUploadService 코드를 한번 살펴볼 차례야.
package com.woohahaapps.fileupload.service;

import com.woohahaapps.fileupload.repository.FileSystemRepository;
import org.springframework.beans.factory.annotation.Autowired;
import org.springframework.stereotype.Service;
import org.springframework.web.multipart.MultipartFile;

@Service
public class FileUploadService {
    private final FileSystemRepository repository;

    @Autowired
    public FileUploadService(FileSystemRepository repository) {
        this.repository = repository;
    }

    public void store(MultipartFile file) {
        repository.store(file);
    }
}
FileUploadService 클래스는 @Service 애노테이션으로 정의했고, 내부 멤버변수로 FileSystemRepository 멤버를 의존성 주입받고 있어. FileUploadService의 store 함수는 repository.store 함수를 호출하고 있지.
이렇게 서비스와 리파지토리로 패키지별로 클래스를 구분해서 작성하는 것은 클래스별 임무가 다르기 때문이야.
리파지토리
이제 실체의 코드가 담겨질 리파지토리 클래스 FileSystemRepository 를 살펴볼께.
package com.woohahaapps.fileupload.repository;

import lombok.extern.slf4j.Slf4j;
import org.springframework.stereotype.Repository;
import org.springframework.web.multipart.MultipartFile;

import java.io.IOException;
import java.io.InputStream;
import java.nio.file.Files;
import java.nio.file.Path;
import java.nio.file.Paths;
import java.nio.file.StandardCopyOption;

@Repository
@Slf4j
public class FileSystemRepository {

    private final Path storeLocation = Paths.get("upload-dir");

    public void store(MultipartFile file) {
        if (file.isEmpty()) {
            throw new RuntimeException("failed to store empty file");
        }
        Path destinationFile = this.storeLocation.resolve(
                        Paths.get(file.getOriginalFilename()))
                .normalize().toAbsolutePath();
        log.debug("DestinationPath: " + destinationFile.toString());

        if (!destinationFile.getParent().equals(this.storeLocation.toAbsolutePath())) {
            throw new RuntimeException("cannot store file outside current directory");
        }

        try (InputStream inputStream = file.getInputStream()) {
            Files.copy(inputStream, destinationFile, StandardCopyOption.REPLACE_EXISTING);// overwrite if exists
            log.info("successfully file stored: {}", destinationFile);
        } catch (IOException e) {
            throw new RuntimeException("Failed to store file.", e);
        }
    }
}
store 함수의 내용을 간단하게 설명하면, 파라미터로 전달받은 MultipartFile 형 변수로부터 파일 이름(getOriginalFilename())을 뽑아내어 저장 파일 이름으로 만들어서 파일로 저장(Files.copy)한다는 것이야.
지금까지 설명한 파일들이 구성된 프로젝트는 아래와 같아.
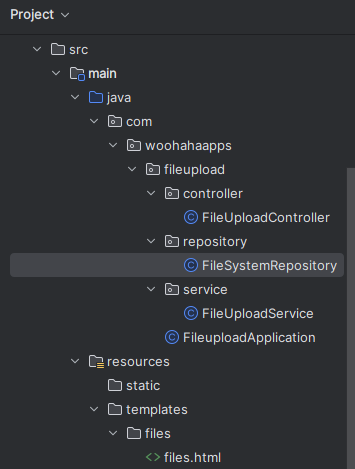
이제 프로젝트를 빌드하고 실행시켜서 웹브라우저에 localhost:8080/files 라고 입력해볼께.

“파일 선택” 버튼으로 업로드할 파일을 선택한 후에 “upload” 버튼을 클릭하면 아래와 같이 에러가 발생할거야.
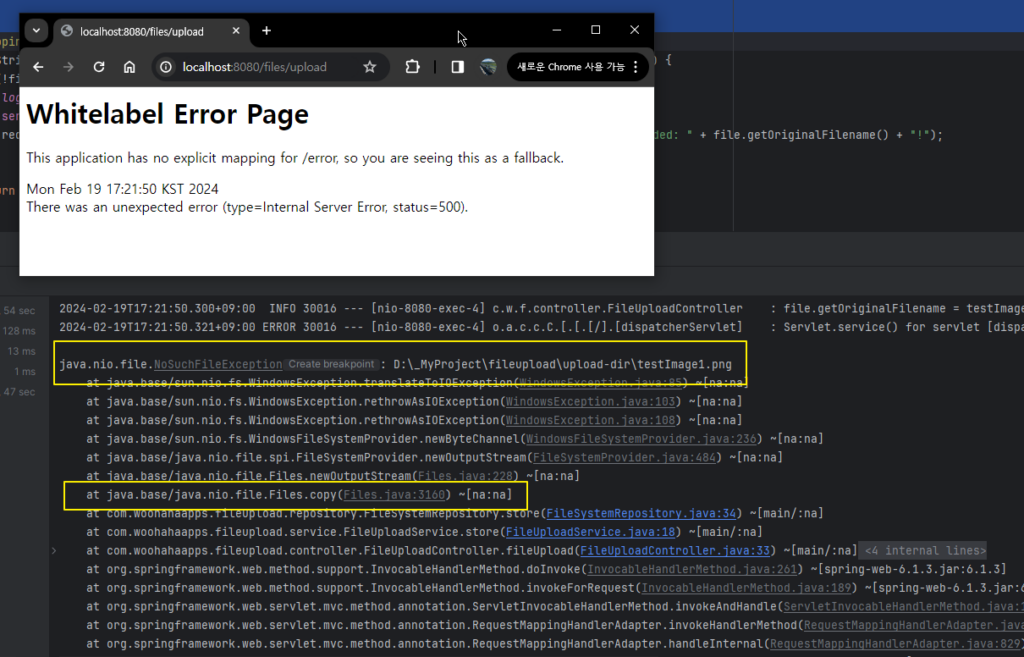
Files.copy 함수까지 호출된 상태에서 NoSuchFileException 이 발생했으므로 로그에 남겨진 파일 경로의 파일을 write 할 수 없다는 것으로 이해되지. 즉 파일 저장 경로인 upload-dir 을 만들어두지 않아서 발생한 에러야(각자마다 프로젝트 경로가 다르겠지만, D:\_MyProject\fileupload 가 내가 만든 프로젝트의 경로라는 것을 참고삼아서 이해해줘).
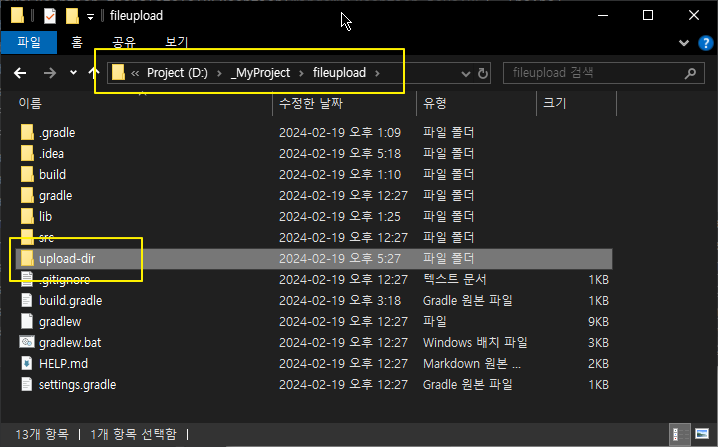
에러를 해결하기 위해서 내가 직접 파일 저장 경로인 D:\_MyProject\fileupload\upload-dir 을 만들고나서 다시 실행시켜볼께.
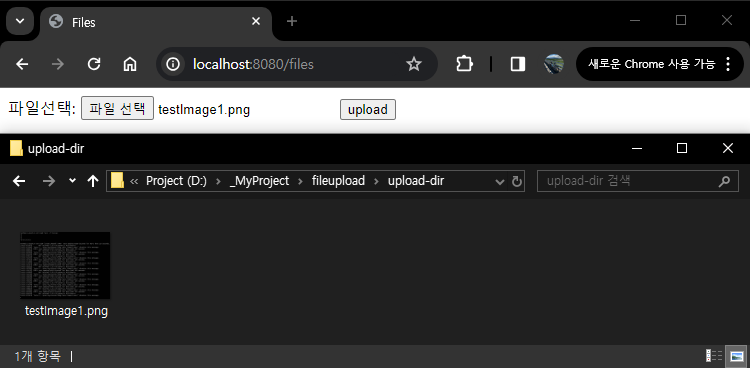
정상적으로 upload-dir 디렉토리에 파일이 업로드된 것을 확인할 수 있어.
시행착오 (아주 멍청한~)
내가 이 연습 프로젝트를 작성하는 과정에서 왜 업로드가 안되지? 라고 헤맸던 부분이 있어.
org.springframework.web.multipart.MultipartException: Current request is not a multipart request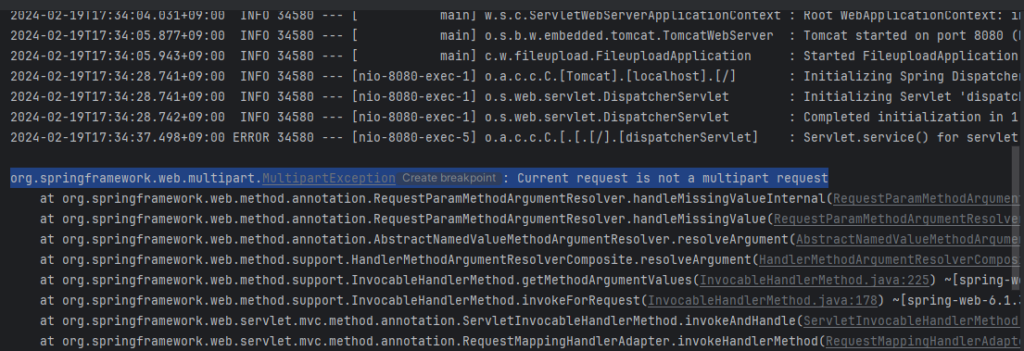
웹페이지에서 선택한 파일이 전달되는데 multipart request 가 아니라는거지.
파일 업로드시에 설정해야 하는 부분이 빠진 것인가? 하고 Current request is not a multipart request 라는 검색어로 많은 웹페이지를 검색해봤었어.
그래서 건져지는 해결방법을 이것저것 다 적용해봤는데도 해결이 안되더라고. 화가 날 지경까지 갔다가…
내가 오타를 낸 사실을 발견했어.
<form action="/files/upload" method="post" endtype="multipart/form-data">위에서 설명한 코드에서는 정상적으로 enctype 이라고 기록했으니 잘 된거지만, 처음에 endtype 으로 기록했었거든.
다음에는 더 이상 설명되지 않는 에러를 만나면 더 눈을 크게 뜨고 오타가 없는지부터 살펴봐야겠어.
'SpringBoot' 카테고리의 다른 글
| [연재] SpringBoot diary - UI 개선 front-end (bootstrap + thymeleaf) (0) | 2024.03.23 |
|---|---|
| [연재] SpringBoot diary - mybatis resultType="map" (1) | 2024.03.23 |
| [연재] SpringBoot diary - BootStrap 을 이용한 html 페이지 구성 (0) | 2024.03.21 |
| [연재] SpringBoot diary - mybatis (0) | 2024.03.21 |
| spring boot + gradle Project 만들기 (0) | 2024.03.05 |


